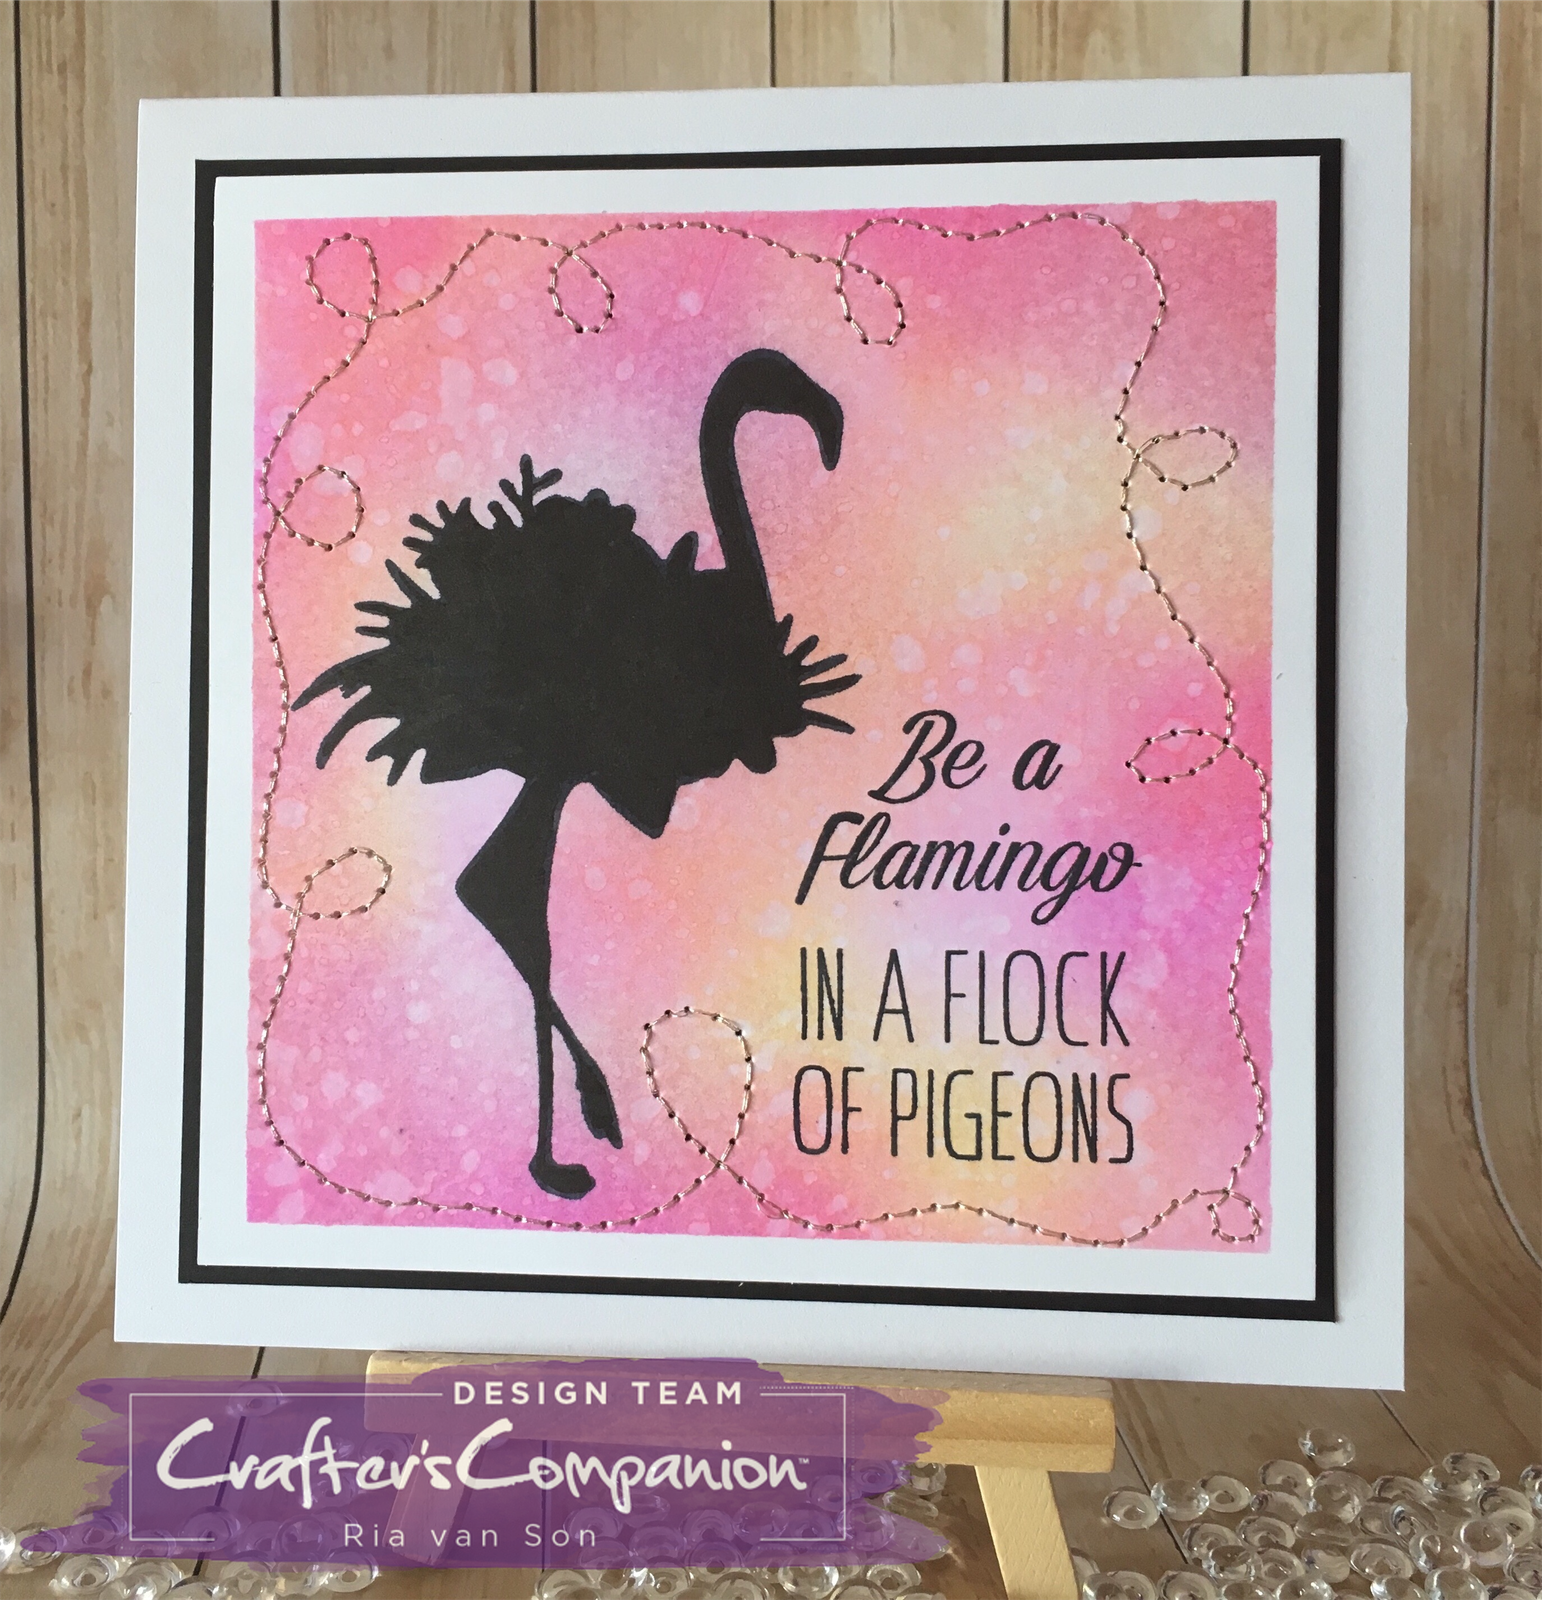
I made alot of pictures while I was making this card so I could show you all how I did it. I used the Gemini Silhouette Flamingo die.
--------
Tijdens het maken van deze kaart heb ik een hoop foto's gemaakt en dacht dat het leuk was om te laten zien. Ik heb de nieuwe Gemini Silhouette Flamingo mal gebruikt.

I had a cut out left from another project and thought it would be perfect to use as a stencil. So I cut a piece of Sheena Douglass stamping card into 13x13 cm. And taped it to the craftsheet with low tack tape. I used a make up sponge to add the Finesse Waterproof ink to the paper.
-------------
Ik had van een vorig project niet alle restjes weggegooid en dacht dat de cutout van de flamingo wel heel erg geschikt zou zijn als stencil. Dus Sheena Douglass stampingcard van 13x13 cm gesneden en deze vastgeplakt op de craftsheet met paarse tape van de action.

These are the 3 colors I am going to use for my background. Spectrum Noir Harmony Water reactive Inkpads : straw bale, fuchsia and pink tulip.
----------
Ik gebruik de volgende 3 kleuren Spectrum Noir Harmony Waterreactive inktpads: straw bale, fuchsia en pink tulip.

I start with the pink tulip and just add here and there some pink with the sponge.
----------
Ik be gestart met de pink tulip en plaats hier en daar wat roze op het papier.

Then I do the same with the straw bale and fill up all the white spots.
--------
Met de straw bale doe je precies hetzelfde alleen vul je nu al de witte gedeeltes.

Than you use the fuchsia and go over some of the other colors. So they blend into new colors. I used some waterdrops to bleach the ink on the paper so you get the white spots on your work.
---------
Daarna gebruik je de fuchsia en ga je over bepaalde gedeeltes heen en cree'er je nieuwe tinten.
Ik heb met wat waterdruppels de inkt wat gebleekt zodat je de vlekjes krijgt.

I wanted to use one of the Quirky sentiments that I have but the flamingo was in the way on the stamp. So I carefully cut the sentiment from the bird. I did it in straight lines so when needed they fit back together perfectly.
------------
Ik wilde de tekst van deze Quirky stempel van Crafter's Companion gebruiken maar de flamingo zat in de weg. Dus heb ik de tekst voorzichtig van de vogel los geknipt. Ik heb wel rechte lijnen gebruikt zodat ik de stempel wel nog samen kan gebruiken.


I am using the Spectrum Noir Finesse Waterproof inkpad to stamp the sentiment with on the paper.
----------
Ik gebruikt de Spectrum Noir Finesse Waterproof inktpad om de tekst mee te stempelen.

The waterdrops also have bleached some parts of the Flamingo so I used my Spectrum Noir Artliner BR to go over these spot.
-----------
De waterdruppels hebben ook de flamingo wat gebleekt helaas maar heb die weg gekleurd met de Spectrum Noir Artliner BR.

I want some stitching around the borders and went for a swirly motif.
-------
Ik wilde een leuk stikrandje rondom de kaart.

I used silver metallic thread to make the stitches.
--------
Ik heb zilver metallic draad gebruikt voor de steekjes.

The base card is 15x15cm and I cut out a piece of black cardstock at 14x14 cm. And glued it to the cardbase with the Crafter's Companion Red liner tape.
-----------
De basis kaart is 15x15 cm en ik heb zwart karton gebruikt en dat gesneden op 14x14 cm. En dat vastgeplakt met de CC red liner tape.

Then I added the Flamino also with the CC red liner tape to the black cardstock.
----------
Daarna heb ik de flamingo op het zwart geplakt ook weer met de CC Red liner tape.

And then your card is finished. It almost took more time to write this down then to make the card....
-------
En dan is het kaartje klaar. Het schrijven duurde langer dan het maken hahahaha.
Ik wil graag meedoen met de volgende challenges.....
hugs Ria

